> ## Documentation Index
> Fetch the complete documentation index at: https://docs.yumiproxy.com/llms.txt
> Use this file to discover all available pages before exploring further.
# AdsPower
**配置前请先在YumiProxy获取IP,确保代理设置正确,以确保服务正常运行。**
1. 进入AdsPower界面,点击左侧“新建浏览器”。
2. 下划找到代理配置一栏,选择“自定义”,将已经生成的链接按“主机:端口”的格式填入,然后依次填好代理账号和密码。
3. 点击检查代理测试是否连接成功,之后点击“确定”,成功就会直接跳转至“环境管理”界面,打开使用即可。
完成上述步骤后,您现在可以使用YumiProxy的代理访问AdsPower中的网页。
**如果您在使用过程中有任何问题或建议,欢迎随时联系我们。我们很高兴听到你的想法并提供帮助!**
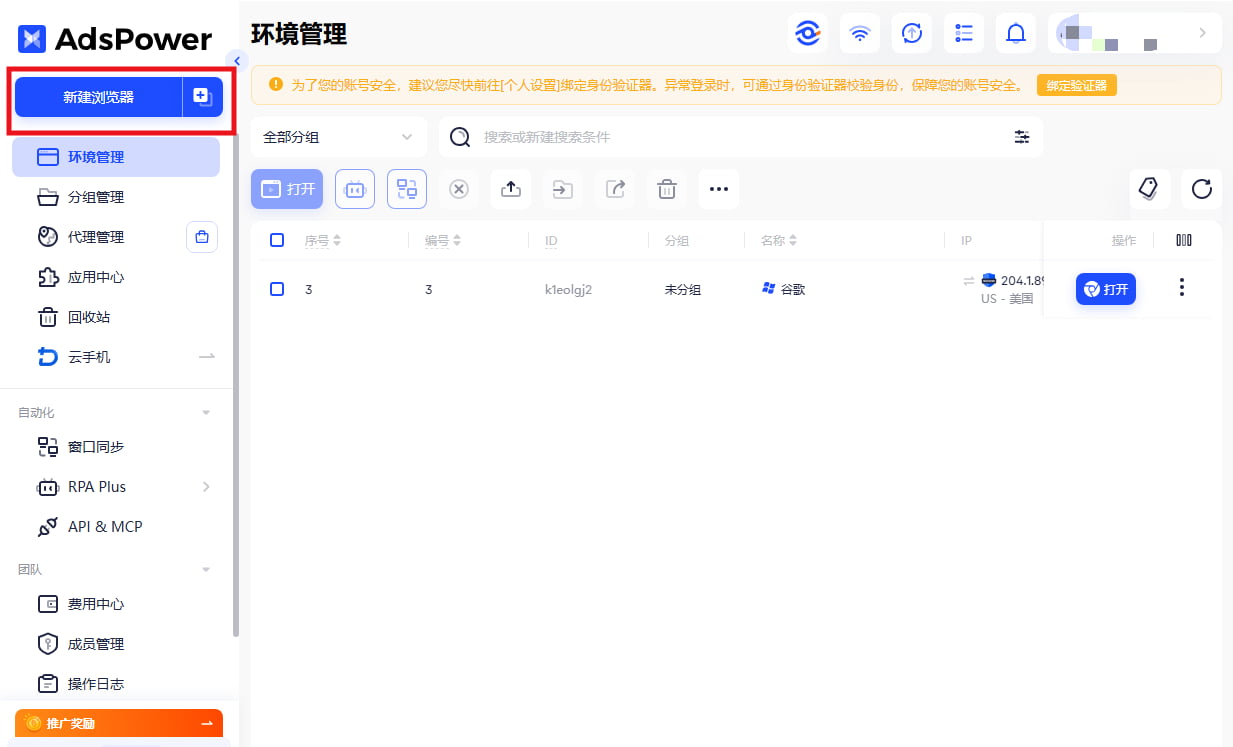 2. 下划找到代理配置一栏,选择“自定义”,将已经生成的链接按“主机:端口”的格式填入,然后依次填好代理账号和密码。
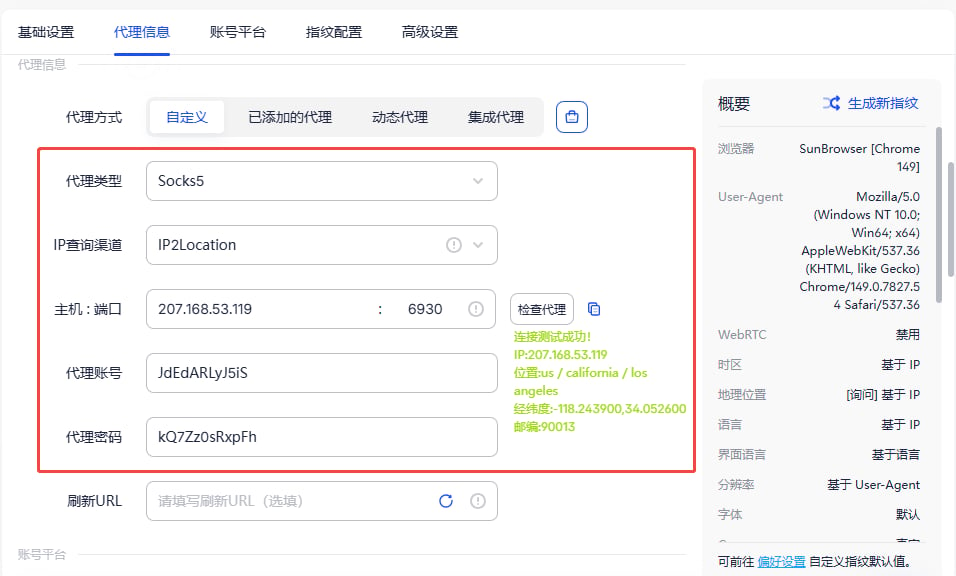 3. 点击检查代理测试是否连接成功,之后点击“确定”,成功就会直接跳转至“环境管理”界面,打开使用即可。
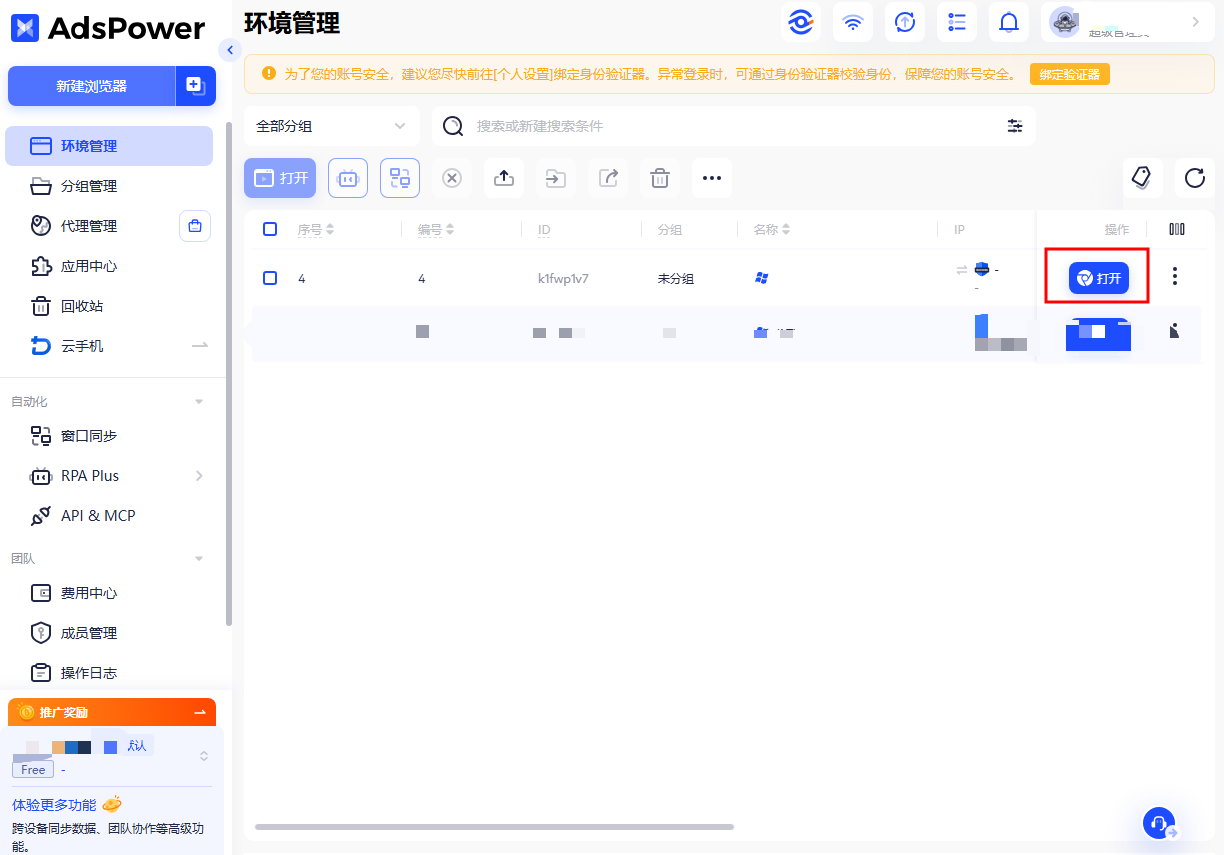
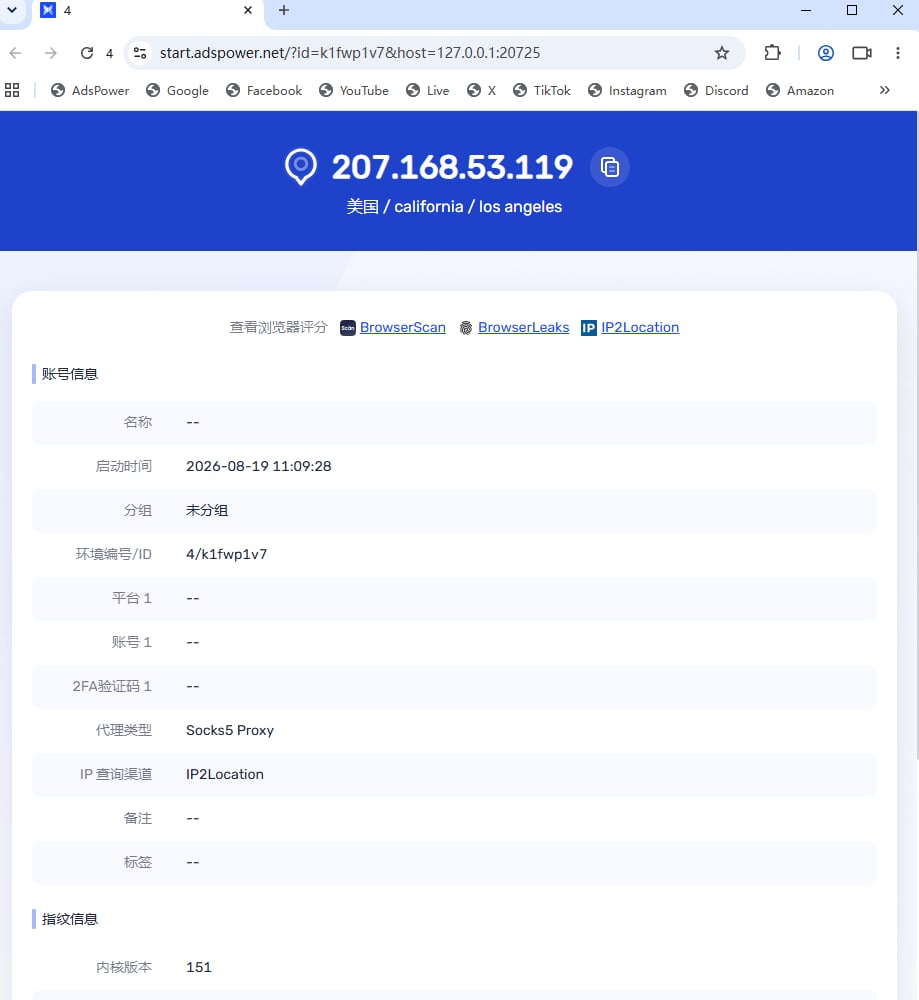 完成上述步骤后,您现在可以使用YumiProxy的代理访问AdsPower中的网页。
**如果您在使用过程中有任何问题或建议,欢迎随时联系我们。我们很高兴听到你的想法并提供帮助!**
完成上述步骤后,您现在可以使用YumiProxy的代理访问AdsPower中的网页。
**如果您在使用过程中有任何问题或建议,欢迎随时联系我们。我们很高兴听到你的想法并提供帮助!**