

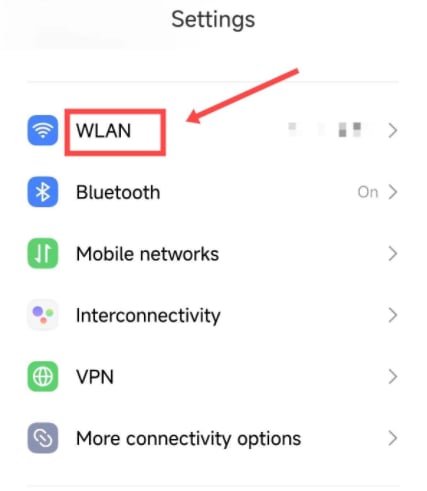
- Open the device Settings app and tap WLAN or Wi-Fi to access the wireless network list.
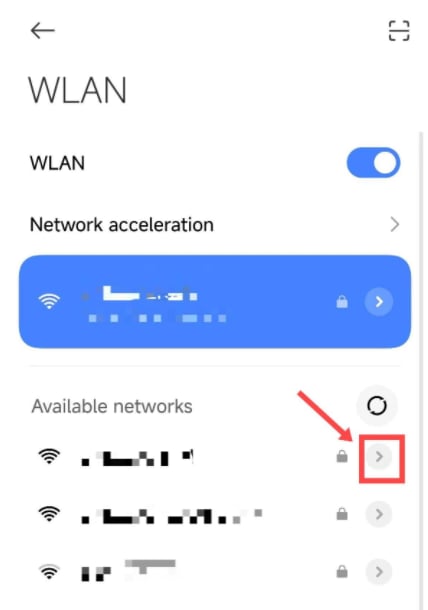
- Locate the Wi-Fi network you are currently connected to, and tap the configuration icon (typically a gear or arrow) on its right side to enter the network details page.
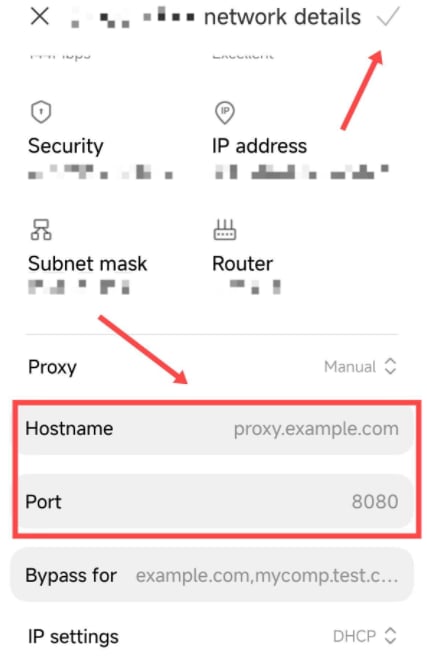
- On the network details page, change the proxy setting from None or Auto to Manual (or Static). Then, enter the hostname (proxy server address) and port number as provided by your proxy service provider. Once completed, tap the Save icon in the upper-right corner to apply the changes.
- Open your device’s browser and navigate to any webpage. An authentication dialog will appear — enter the username and password provided by your proxy service provider.
- After authentication, access an IP detection website through your browser. If the displayed current IP address matches the configured proxy IP, the proxy setup is successful.
Operating Systems Proxy Integration Guide
Android
Before integrating a proxy into your Android device, ensure that the proxy service has been correctly configured and is functioning properly.
The specific steps are as follows:
Was this page helpful?