

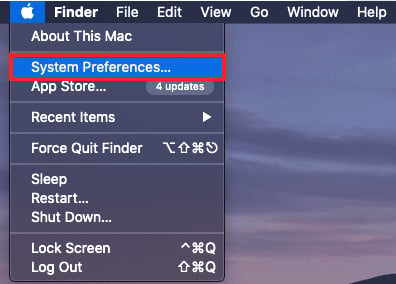
- Click the Apple icon in the upper-left corner of the screen and select System Preferences from the drop-down menu.
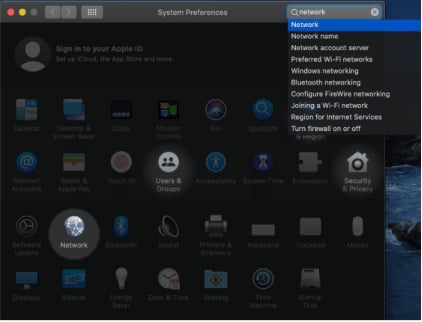
- In the System Preferences window, click the Network icon.
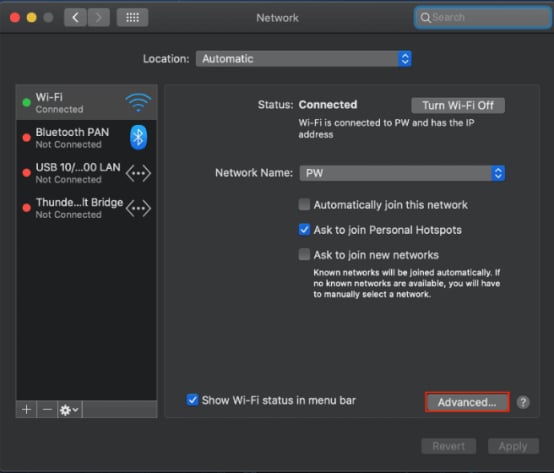
- On the Network settings interface, click the Advanced button in the lower-right corner of the window.
- After entering the Advanced settings, switch to the Proxies tab. In the configuration area on the right, select the appropriate protocol type (e.g., HTTP, HTTPS, etc.) based on your actual needs, and fill in the server address, port number, username, and password as provided by your administrator or proxy service provider.
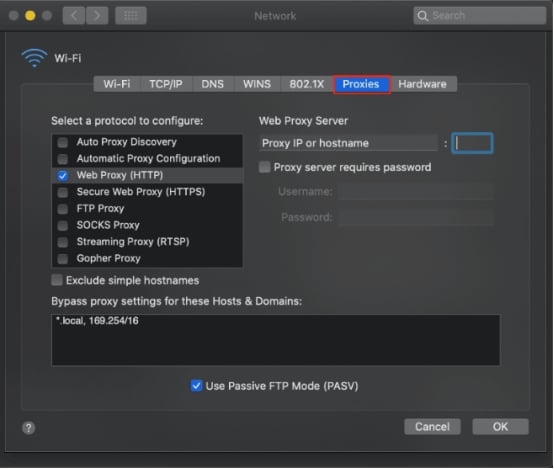
- After confirming that all information is entered correctly, click OK to save the configuration and close the Network settings window.
- Once configured, access an IP detection website through your browser. If the displayed current IP address matches the configured proxy IP, the proxy setup is successful.
Operating Systems Proxy Integration Guide
Mac
Before integrating a proxy into Mac, ensure that the proxy service has been correctly configured and is functioning properly.
The specific steps are as follows:
Was this page helpful?