

- Install a proxy extension in Firefox, such as SwitchyOmega, or choose any other commonly used extension. Search for it in the Firefox Web Store and add it to your browser.
- Download the required Firefox extension package, decompress it, and locate the extension folder.
- Click the three dots (menu button) on the right side of the Firefox address bar, select Extensions, and then click Manage Extensions.
- On the extensions management page that opens, turn on the Developer mode toggle, then click the extension icon on the right side of the Firefox address bar to open the installed proxy extension.
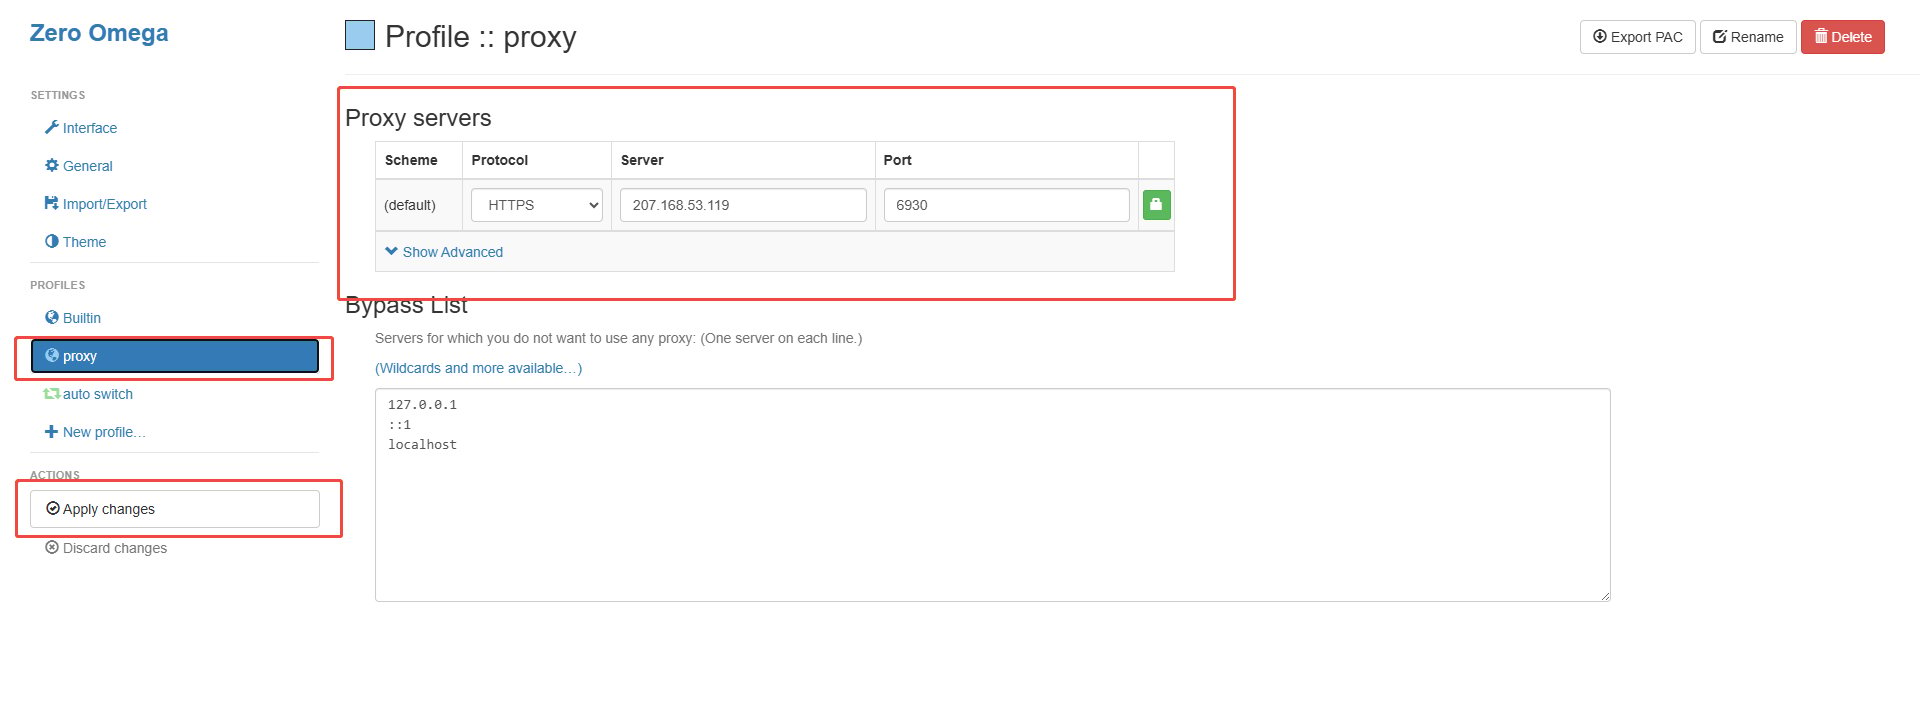
- In the proxy extension, add the proxy configuration, including proxy protocol, proxy server address, port, username, and password, and save the settings. Be sure to click the small lock icon on the far right to enter your account credentials.
- Access the IP detection website at through your browser. If the displayed current IP address matches the proxy IP, the proxy setup is successful.
Browsers & Extensions Proxy Integration Guide
Firefox
Before integrating the proxy into Firefox, please ensure that the proxy service itself has been properly configured and is functioning correctly. The specific steps are as follows:
Was this page helpful?